

Key Takeaways
Why Gallery Walls Go Wrong (and How to Avoid It)
Most gallery wall mistakes happen before the first nail is placed. Homeowners start hanging individual frames they love, then try to build outward — resulting in awkward spacing, mismatched scales, and far more wall damage than necessary. A gallery wall rewards upfront planning more than almost any other décor project.
The other common pitfall is inconsistency without intention. Mixing too many frame finishes (black, gold, natural wood, white) in the same arrangement creates visual noise rather than personality. Choose one or two finishes and vary sizes and shapes instead. If you're still defining your overall aesthetic, building a style moodboard first can save you from buying pieces that won't work together.
For those newer to room decorating, our first-time decorator's guide covers the foundational decisions — scale, proportion, and layering — that apply directly to gallery wall planning.
Create a Style Reference First
If you're unsure what aesthetic you're aiming for, build a visual reference before sourcing frames. Our style moodboarding guide walks you through identifying patterns in what catches your eye — a useful step before you invest in frames or commit to a wall.
What You'll Need
Before starting, gather your tools and materials. The investment in a stud finder and a proper level pays off quickly — eyeballing straight lines almost never works, and relying on a phone's built-in level is less reliable than a dedicated tool.
What you will need
Measuring Tape
Accurately measure wall dimensions and calculate spacing between frames.
Torpedo Level
Ensure individual frames and the overall arrangement hang straight.
Painter's Tape
Mark frame outlines on the wall to test placement without making holes.
Kraft Paper or Newspaper
Trace frame backs to create full-size templates for precise hole placement.
Picture Hanging Strips or Hooks
Secure frames to the wall; choose hardware rated for your frame weight and wall type.
Stud Finder
Locate wall studs for securely hanging heavier frames without relying on anchors alone.
Know Your Wall Type Before Hanging
Hanging heavier frames on drywall requires locating wall studs or using appropriate hollow-wall anchors rated for the load. Hanging into plaster, concrete, or tile calls for different hardware entirely. Using the wrong fastener for your wall type can result in frames falling and causing damage or injury. When in doubt about load capacity or wall construction, consult a hardware professional or handyman before proceeding.
If you're approaching a broader room refresh and want to sequence your projects thoughtfully, the room redecoration planning checklist is a useful starting point before investing in new frames or prints.
Step-by-Step: Planning, Spacing, and Hanging
Follow these steps in order. Skipping the floor layout stage is the single most common shortcut that leads to frustrating results.
Gather and Assess Your Pieces
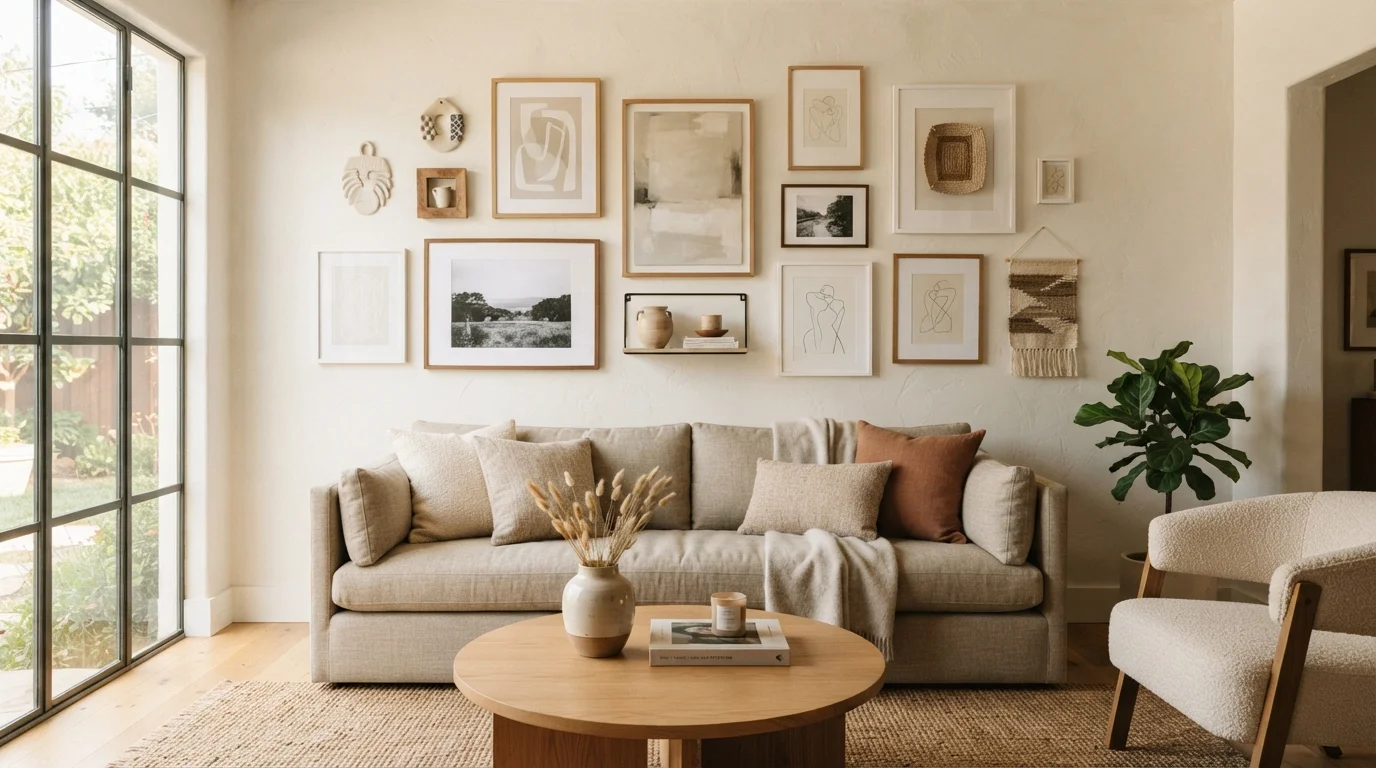
Lay everything you're considering flat on the floor. Include frames of varying sizes, orientations (portrait and landscape), and any non-frame objects — mirrors, ceramic wall pieces, or woven textiles — that might join the arrangement. Step back and take a photo from above. You're looking for a rough sense of variety without chaos.
A good gallery wall typically has a dominant anchor piece — usually the largest frame — surrounded by supporting pieces that vary in size but feel cohesive in tone or palette. Understanding visual weight helps here: heavier, darker, or larger pieces carry more visual mass and should be balanced across the arrangement, not clustered together.
Define Your Wall Space
Measure the wall section you're working with. For a sofa or bed arrangement, the gallery should span roughly two-thirds of the furniture width below it — wider looks unmoored; narrower looks cramped. Mark this boundary lightly with pencil or painter's tape directly on the wall.
Decide on your center point. Most arrangements are anchored either to the visual center of the wall or to the center of the furniture beneath. Mark that center — it's your reference for everything that follows.
Plan the Layout on the Floor
Use your measured wall dimensions to tape off an equivalent rectangle on the floor. Arrange your pieces within that boundary, working outward from your anchor piece. Maintain consistent spacing — 2 to 3 inches between frames is a reliable standard. Tighter gaps (1.5 inches) work for dense, intentional salon-style arrangements; wider gaps start to look disconnected.
Photograph the floor layout. You'll reference this image while hanging.
Transfer the Layout to the Wall
Cut kraft paper or newspaper to the exact size of each frame. Mark the hanging hardware location on the back of each template — where the nail or hook will actually go. Tape the templates to the wall using painter's tape, replicating your floor layout exactly. Step back frequently and adjust.
Once satisfied, use a level to confirm alignment, then mark the hardware position through each template with a pencil. Remove the paper.
Install Hardware and Hang Frames
Install your hooks, nails, or anchors at each marked point. Work from the center outward, hanging your anchor piece first, then building around it. After each frame goes up, use your level to confirm it's straight — small adjustments are much easier to make now than after the wall is full.
Step back after every two or three additions to check the overall composition. Minor spacing tweaks at this stage are normal.
Evaluate and Refine
Once everything is hung, live with it for a day before making changes. Lighting conditions and room context shift how an arrangement reads. If something feels off, check whether a piece is carrying too much or too little visual weight relative to its neighbors — our guide on the visual weight principle offers a useful framework for diagnosing imbalance.
Small adjustments — swapping one frame for another, rotating a piece, or shifting a position by a few inches — can significantly change how the whole wall reads.
Don't Skip the Layout Step
Hanging frames one at a time without a pre-planned layout almost always results in misaligned groupings and unnecessary nail holes. Spending 20 minutes on a floor or paper mockup saves significant rework later.
Gallery Walls vs. Other Display Approaches
A gallery wall is one of several ways to display collected objects and artwork. If you're drawn to a more structured display, a styled bookshelf can serve a similar purpose with different constraints and advantages — see every approach to styling a bookshelf for a comparison of methods.
Gallery walls excel at filling large, unbroken wall spans, creating personal focal points, and accommodating a mix of media that wouldn't fit a shelf. They're particularly effective in hallways, living rooms, and stairwells — anywhere the wall itself is the primary design opportunity.