

Key Takeaways
Start here
Your Home's Plumbing at a Glance
Next
Shut-Off Valves: Where They Are and Why They Matter
Then
Drain Traps and What They Do
Dig deeper
Water Pressure Basics
When you're ready
DIY Fix or Call a Pro? How to Decide
Your Home's Plumbing at a Glance
A home's plumbing system is really two separate networks working in tandem: a supply system that delivers pressurized fresh water to every fixture, and a drain-waste-vent (DWV) system that carries wastewater away by gravity. Understanding this distinction immediately clarifies why certain repairs behave so differently from others.
Supply pipes run under pressure, meaning a failed joint or cracked line can release water fast. DWV pipes rely on gravity and proper slope — typically ¼ inch of drop per foot of horizontal run — and include vent pipes that exit through the roof to balance air pressure and allow drains to flow freely.
Supply system
The network of pressurized pipes that delivers fresh cold and hot water from the main line to every faucet, appliance, and fixture in your home.
Drain-Waste-Vent (DWV)
The gravity-fed system of pipes that carries wastewater out of the home and uses vent pipes to maintain the air pressure needed for drains to flow properly.
P-trap
The curved pipe section beneath a drain that holds standing water to block sewer gases from entering the home.
Pressure-Reducing Valve (PRV)
A device installed on the main supply line that automatically limits water pressure entering the home to a safe, preset level.
Stop valve
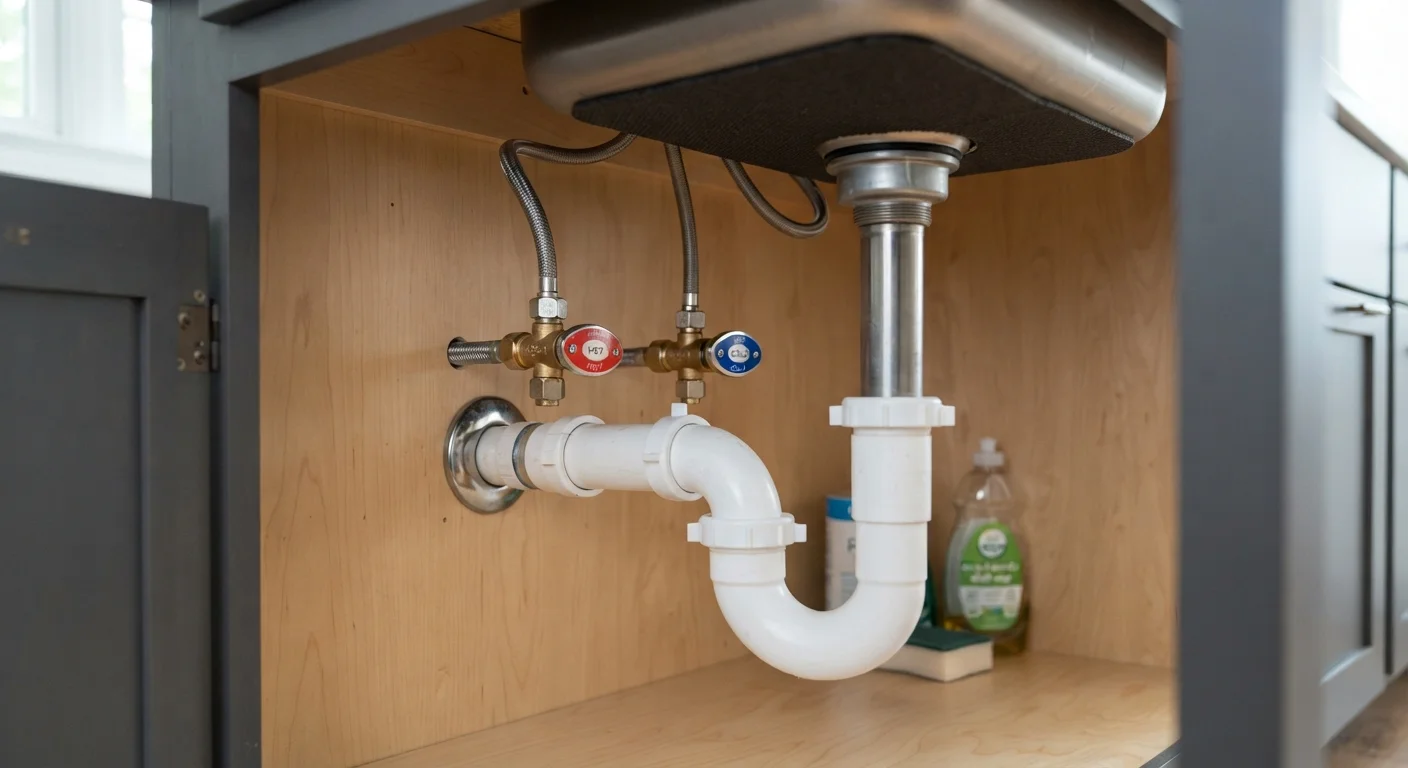
A small shut-off valve located near an individual fixture — such as under a sink or behind a toilet — that lets you cut water to just that one fixture.
Water hammer
A banging or thumping sound in pipes caused when fast-moving water is suddenly stopped, often by a quickly closing valve; typically a sign of pressure or pipe-securing issues.
Just as deferred maintenance compounds in other areas of homeownership, ignoring small plumbing signals often leads to bigger problems. See our guide on garden watering habits for a related example of how routine oversight prevents costly damage.
Shut-Off Valves: Where They Are and Why They Matter
The single most important plumbing skill for any homeowner is knowing how to stop water flow quickly. There are two levels of shut-off to know:
- Main shut-off valve: Cuts water to the entire house. Usually a gate valve (round wheel handle) or ball valve (lever handle) located where the supply line enters the foundation. Locate this valve the day you move in and confirm it turns smoothly.
- Fixture shut-offs (also called stop valves): Small oval or straight valves on the supply lines directly under sinks, behind toilets, and beneath appliances. These let you isolate a single fixture without cutting water to the whole house.
Valves that haven't been turned in years can seize. Periodically exercising them — turning fully off and back on — keeps them functional. If a valve won't budge or leaks when operated, that's a job for a plumber before an emergency forces your hand.
Make a Plumbing Map on Move-In Day
Walk your home and photograph the location of every shut-off valve — main, fixture-level, and appliance connections. Store the images in a home folder or note app. In a real emergency, you won't want to be searching; you'll want to act immediately.
Drain Traps and What They Do
Look under any sink and you'll see a curved section of pipe that dips down then rises back up — that's the P-trap. The curve retains a small pocket of water at all times, forming a physical barrier against sewer gases (including methane and hydrogen sulfide) that would otherwise migrate up through the drain into your living space.
Common P-trap issues first-time homeowners encounter:
- Clogs: Hair, grease, and soap scum accumulate in the curve. Most clogs can be cleared by placing a bucket underneath, unscrewing the slip-joint nuts by hand, and cleaning the trap — no special tools needed.
- Dry traps: Infrequently used drains (guest bathroom, floor drain) can evaporate their water seal. Running the fixture briefly every few weeks prevents this.
- Leaking slip joints: If you see water dripping from the P-trap connections, the nylon washers inside the slip-joint nuts are likely worn. These are inexpensive to replace.
Never Cap or Remove a P-Trap Permanently
Removing a P-trap to improve drainage, or allowing one to remain dry long-term, lets sewer gases enter your living space — a genuine health and safety hazard. If a trap is damaged, replace it with a matching one rather than bypassing it. If you smell persistent sewer odors, investigate the trap before assuming a larger problem.
Water Pressure Basics
Residential water pressure is measured in psi. The generally accepted comfortable range for home plumbing is 40–80 psi, with many plumbers recommending 60 psi as an ideal target. Pressure outside this band creates predictable problems:
| Condition | Symptoms | Common Cause |
|---|---|---|
| Too low (<40 psi) | Weak flow, slow fill times, poor shower pressure | Municipal supply issue, partially closed valve, failing PRV |
| Too high (>80 psi) | Banging pipes (water hammer), running toilets, appliance wear | No PRV or PRV set incorrectly |
A pressure gauge — available at hardware stores — threads onto a hose bib and gives an accurate reading in seconds. If pressure is consistently high, a pressure-reducing valve (PRV) installed by a licensed plumber can protect your entire system. This is not a DIY task, as it involves cutting into the main supply line.
DIY Fix or Call a Pro? How to Decide
A useful mental framework: if the work involves only removing and replacing an accessible component on an existing fixture, and you can isolate water flow with a stop valve, it's generally DIY territory. If it requires opening walls, cutting pipe, working near the main line, or touching gas connections, call a licensed plumber.
Typically manageable for careful DIYers
- Replacing a faucet or showerhead
- Swapping a toilet fill valve or flapper
- Clearing a P-trap clog
- Installing a new supply line between shut-off valve and fixture
Requires a licensed plumber
- Any work on the main sewer line or lateral
- Re-routing or adding supply or drain pipes
- Water heater replacement (especially gas-connected units)
- Any job that requires a permit in your jurisdiction
When in doubt, a diagnostic visit from a licensed plumber — even just to assess and advise — is money well spent. Much like the principle explored in our guide on avoiding costly garden mistakes, catching a plumbing problem early almost always costs less than addressing the downstream damage.
Permits Protect You as the Homeowner
Required permits aren't just bureaucratic hurdles — they trigger inspections that verify work was done safely and to code. Unpermitted plumbing can complicate home sales, void insurance claims, and leave you liable for future problems. Always check with your local building department before starting any work that modifies existing plumbing.