

Key Takeaways
Why Composting Is Worth the Effort
Composting converts organic waste — items that would otherwise fill a landfill — into a soil amendment that genuinely improves your garden. Finished compost adds organic matter that helps sandy soils retain moisture, breaks up compacted clay, feeds soil microorganisms, and provides a slow-release source of plant nutrients. Unlike synthetic fertilizers, it builds long-term soil health rather than delivering a short burst of nutrients.
Home gardeners who compost regularly often find they need less supplemental fertilizer over time, and their plants show improved resilience to drought and disease. Whether you're setting up a new vegetable garden or maintaining established beds with perennials and annuals, a steady supply of finished compost is one of the most useful resources you can produce at home.
Never Compost These Materials
Avoid adding meat, fish, bones, dairy products, greasy or oily foods, pet waste, or diseased plant material to your home compost pile. These items either attract pests, introduce pathogens, or fail to break down safely in a typical backyard setup. Stick to plant-based kitchen scraps and untreated yard waste for a healthy, odor-free pile.
What You'll Need Before You Start
Getting a compost system running doesn't require expensive equipment, but a few basic tools and a reliable source of materials will make the process much smoother. Review the prerequisites and tool list below before building your first pile.
What you will need
Compost bin or wire cage
Contains the pile, retains heat, and keeps pests out more effectively than an open heap.
Pitchfork or garden fork
Used to turn and aerate the compost pile, which accelerates decomposition.
Countertop compost crock or sealed container
Collects kitchen scraps conveniently indoors before transferring them to the outdoor pile.
Compost thermometer
Measures internal pile temperature to confirm hot composting is reaching the 130–160°F range needed to kill weed seeds.
Garden hose or watering can
Maintains the ideal moisture level — roughly as damp as a wrung-out sponge.
Step-by-Step: Building and Managing Your Compost Pile
Follow these steps whether you're starting a hot pile for fast results or a cold pile for low-maintenance recycling. The core principles — balance, moisture, and aeration — apply to both methods.
Choose your composting method and location
Decide between hot composting (active turning every few days, finished in 4–8 weeks) and cold composting (minimal effort, finished in 6–12 months). Hot composting suits gardeners who want fast results and generate a lot of material; cold composting is better for those who simply want a low-maintenance way to recycle scraps over time.
Site your bin or pile in a spot with partial shade, good drainage, and easy access from the kitchen and garden. Avoid placing it directly against a wooden fence or structure, as moisture can cause rot.
Gather your browns and greens
Successful compost depends on balancing two ingredient types:
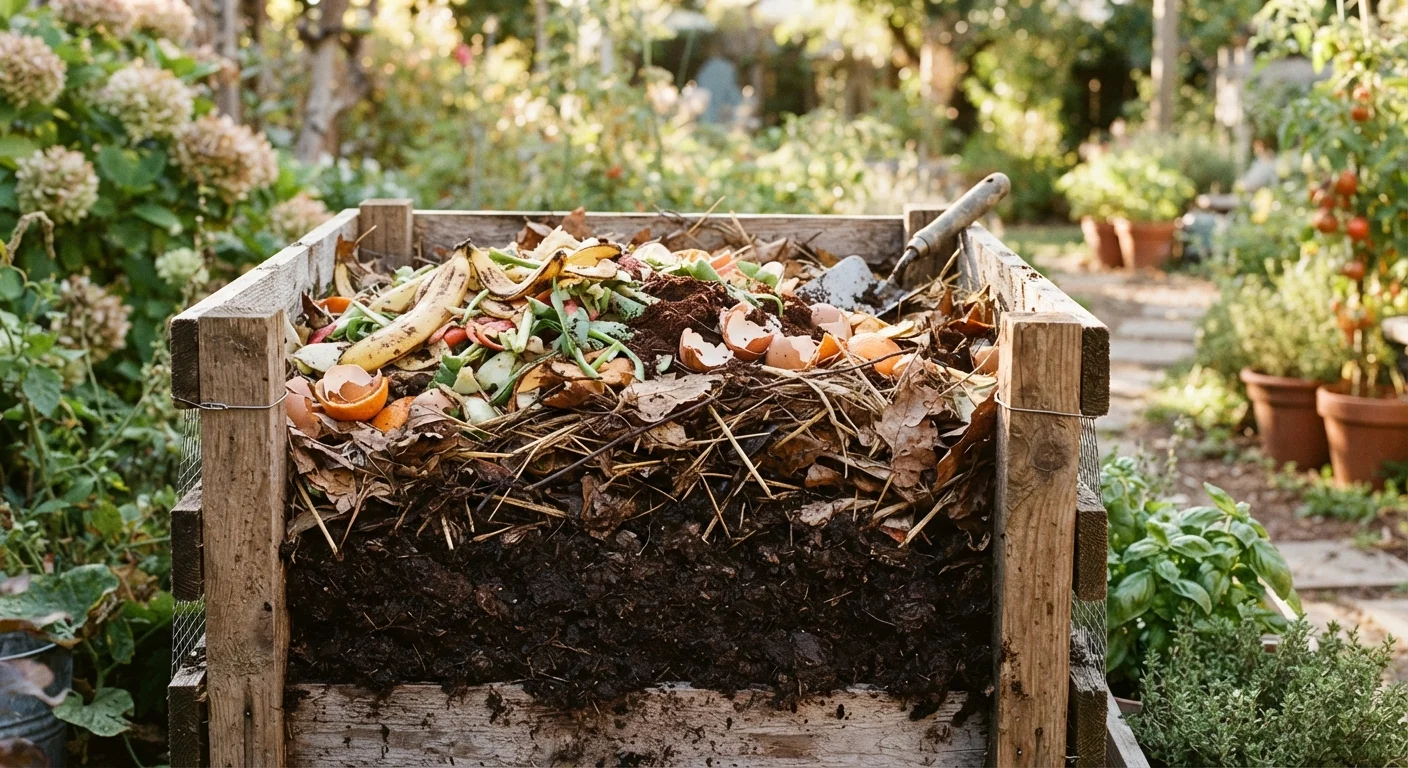
- Browns (carbon-rich): dry leaves, cardboard torn into pieces, straw, paper bags, wood chips, and paper towels.
- Greens (nitrogen-rich): vegetable and fruit scraps, coffee grounds and filters, tea bags (paper only), fresh grass clippings, and plant trimmings.
A general guideline is roughly 2–3 parts browns to 1 part greens by volume, though the exact ratio can be adjusted based on how the pile behaves.
Build or add to your pile in layers
Start with a 4–6 inch base layer of coarse browns (like small twigs or wood chips) to promote airflow at the bottom. Then alternate layers of greens and browns, lightly watering each layer if materials feel dry. Aim for the pile to reach at least 3 feet in all dimensions — this critical mass is what allows internal temperatures to rise in hot composting.
Maintain moisture and aeration
Check pile moisture every few days. The material should feel like a wrung-out sponge — damp throughout but not dripping. If it's too dry, add water and mix. If it smells bad or looks matted, add more browns and turn the pile to reintroduce air.
For hot composting, turn the pile every 3–7 days using a pitchfork, moving outer material to the center. For cold composting, turn once every few weeks or whenever you add a significant amount of new material.
Recognize and harvest finished compost
Finished compost is dark brown, crumbly, and smells earthy — similar to rich forest soil. You should not be able to identify the original materials. The pile will also have reduced significantly in volume compared to when you started.
To harvest, stop adding new material and allow the remaining pile to fully cure. Sift out any large, undecomposed chunks and return them to start a new batch.
Apply compost to your garden
Work 1–3 inches of finished compost into the top 6 inches of garden beds before planting, or use it as a top dressing around established plants. Compost can also be mixed into potting soil or used to side-dress vegetables mid-season. For lawn use, a thin layer of sifted compost can be broadcast over grass after aeration.
For more on putting your compost-enriched soil to work, see our guide to starting a vegetable garden from scratch.
Speed Up Decomposition Naturally
Chop or shred materials into smaller pieces before adding them to the pile — smaller surface area means faster microbial activity. A compost activator isn't necessary if your ratio is correct, but a shovelful of finished compost or garden soil introduces beneficial microbes that can jumpstart a new pile.
Balance Matters More Than Volume
Dumping large quantities of nitrogen-rich greens — like fresh grass clippings — without adding browns will make your pile slimy, smelly, and slow to decompose. Always layer or mix in roughly equal parts of brown material whenever you add a significant batch of greens. A pile that smells like ammonia is a clear signal it needs more carbon.
Fitting Composting Into Your Garden Routine
Composting works best when it becomes a habit rather than a project. Keep a small covered container on the counter to collect daily kitchen scraps, and transfer it to the outdoor pile every few days. In autumn, the falling leaves that might otherwise go to the curb become your most valuable source of browns — our fall garden prep guide covers how to fold leaf collection into your seasonal routine.
Compost pairs well with other soil-health practices. While mulching sits on top of the soil to suppress weeds and retain moisture, compost works below the surface to feed microbial life and improve structure — the two approaches complement each other effectively. For a month-by-month view of when to turn, harvest, and apply, refer to our seasonal garden maintenance reference.